I love my silver - sterling or silver plate - either one is fine with me. I like the feel of it - the designs - everything. But - I don't like to polish silver. So here's a wonderful method - keep those pretty, vintage, family heirloom pieces shiny and bright.
Of course the best way to keep them shiny is to use them, though most of us don't use them very often, so they might sit in the cupboard and get tarnished. What to do?
Gather up your supplies - a glass bowl or deep baking dish (depending on the size of the items to be polished), baking soda, aluminum foil - and lots of boiling water. Don't forget your tongs - they are handy for handling hot pieces of silver.
What is this you say. No silver polish - no soft rags for rubbing and endless scrubbing of the silver? Nope - none of that.
Just
Boiling water
Baking Soda
Glass bowl or baking dish
Tongs
Let the magic begin!
One of my very favorite pieces - it was black with tarnish - I was so excited to begin that I forgot to take a photo of the before.
Magic, I tell you - plain and simple magic
Line a glass baking dish with aluminum foil - (in the sink is best) making sure it goes up the sides and ends of the pan.
Lay the silver pieces in it that need polishing and pour boiling water over it all - to cover the pieces. I definitely have some pieces that need polishing.
Now the magic - add 1/4 cup baking soda - just plain old baking soda from your cupboard.
 Commercial silver polish is extremely toxic - and I don't like handling it - or washing it down the sink. So this method is perfect.
Stand back and watch the magic!!!!!
Tiny bubbles appear - and the shine begins to return to the silver.
As the pieces become shiny once again I pluck them out of the hot water with a pair of tongs (they are hot from being in the boiling water). Rinse with cold water and wipe dry with a clean cloth.
If there are a few stubborn spots make a paste of a small amount of baking soda and water - rub the spots and they will disappear.
Magic - I tell you - total magic.
And look what you get!!!
You start with tarnished silver
Your reward for a few minutes of easy work is a nice pile of very shiny silver
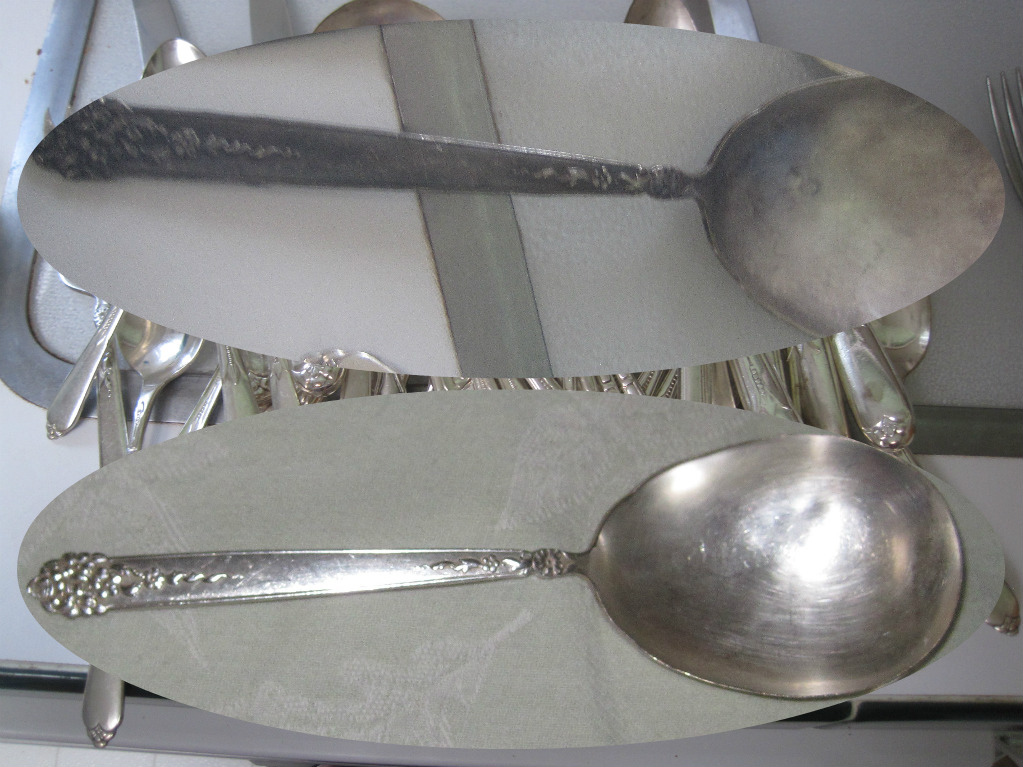
Top - Before Bottom - After
Ready for the table.
A favorite serving spoon - tarnished
And now shiny bright - a little extra rubbing was required on the flowery part of the handle - but only a little.
Oh - the poor "before" meat fork
Two big serving spoons - dark and dingy
Before and After
Another favorite serving spoon - rescued with magic
Handle of the Pie Server
It was sad before
But was a good pie server
Shiny and pretty now - ready for Thanksgiving pies - what kind shall we make?
This past weekend we found these two vintage crystal and silver jam jars. They were black with tarnish - but I knew how to fix them up. It took just minutes and they were bright and shiny. Before on the left - and after on the right. They are ready for Thanksgiving. They can also be used for pickle jars on the table - if you use a pickle fork in the slot instead of a jelly spoon.
Can you see the slot on the left side of one of the lids of the "before" photos - that is where the spoon handle will stick out for serving jam - or the fork for serving pickles.

Lovely, lovely - and all done with magic. This took me about an hour total to clean all the flatware pieces - and about 10 minutes for the jam jar lids - and everything is eco friendly. Let's go set the table.